
Home › Guides & Resources › Failure Modes
We repair other contractors’ failed injections every month. The causes are so predictable we keep a checklist — here it is, published, so you can vet any quote against it. Including ours.
Written by the Concrete Crack Repair Pros field team · Reviewed by our senior injection technicians · Published and last reviewed: August 4, 2026
Why do crack injections fail? Almost never because of the resin — cured polyurethane and epoxy are effectively permanent inside a wall. Injections fail for five human reasons: the crack was surface-sealed instead of filled full-depth, a rigid resin was pushed into a crack that still moves, ports were spaced too widely and missed branches, the crack was a symptom of active structural movement that injection cannot cure, or an earlier DIY attempt contaminated the crack. All five are preventable, and all five are detectable in a quote before you sign it.
On this page: the five failure modes · each mode explained · five questions that vet any quote · FAQ
The callback pattern across thousands of injections is remarkably consistent.
Done to spec, injection has one of the lowest callback rates in basement repair — it is why a lifetime warranty on injection is commercially possible at all. But when a repair does fail, it fails in one of a handful of ways, and the way tells you exactly what was skipped. The taxonomy below is the checklist our own crews are audited against. Nothing in it is proprietary; it is simply what the failed repairs we get called to redo have in common. Use it on any contractor’s quote, including ours.
Every mode has a tell in the quote — before any resin is mixed.
| Mode | What actually happened | How it shows up later | The question that exposes it up front |
|---|---|---|---|
| 1. Surface-only seal | Crack veed and dressed at the face; depth never filled | Leak returns within a few seasons, often at a patch edge | “Will resin be injected through the wall’s full thickness?” |
| 2. Wrong resin | Rigid epoxy in a crack that still breathes | Fine crack re-opens tracking the original line | “Why this resin for this crack — and did you check movement?” |
| 3. Port shortcuts | Ports too far apart; branches and hairline forks skipped | Damp spots beside a “repaired” crack after heavy rain | “How do you set port spacing, and how do you confirm refusal?” |
| 4. Structural symptom | Crack was the message of ongoing settlement; injection silenced it briefly | New cracks nearby; doors and floors keep shifting | “What did the assessment rule out before proposing injection?” |
| 5. Contaminated crack | Prior DIY epoxy or caulk skins block resin paths | Incomplete fill despite honest technique | “The crack was patched before — what prep does that add?” |
What the wall looks like when we open these calls up.
Mode 1 — the surface-only “injection.” The dominant failure we see, and the engine of the cheap-quote economy. The finished photo looks identical to real work; the difference is entirely inside the wall. Our lifespan guide has a cross-section diagram of exactly why the skin lets go — water sits in the still-open crack and works on the patch from behind.
Mode 2 — rigid resin in a moving crack. Epoxy is magnificent where strength was lost and fatal where flexibility was needed. A wall that breathes seasonally will shear a rigid bond line and re-open as a hairline echo of the original. The prevention is boring: measure movement first, then choose the resin — never the reverse order, and never one resin for every job.
Mode 3 — port shortcuts. Injection is plumbing at millimetre scale: resin follows pressure through the path of least resistance, and every skipped port or unnoticed branch is a path left dry. Refusal — the point where a port will accept no more resin — is the field proof of a full fill, and rushing to it is how twenty-minute jobs create two-year callbacks.
Mode 4 — injecting a structural symptom. Injection repairs cracks; it does not stop the forces that made them. Active settlement, heaving clay or a failing footing will simply write a new crack beside the repaired one. When an assessment finds movement beyond normal seasonal breathing, the honest answer involves an engineer before an injector — and we say so, at the cost of a sale, because the alternative is Mode 4.
Mode 5 — the contaminated crack. Previous DIY attempts are not fatal, but they change the job: hardware-store epoxy skins and caulks block the paths resin needs, so the crack needs drilling-out and cleaning before a real injection can seat. This is why we ask about repair history on the phone — the prep is priceable in advance, and surprises help nobody.
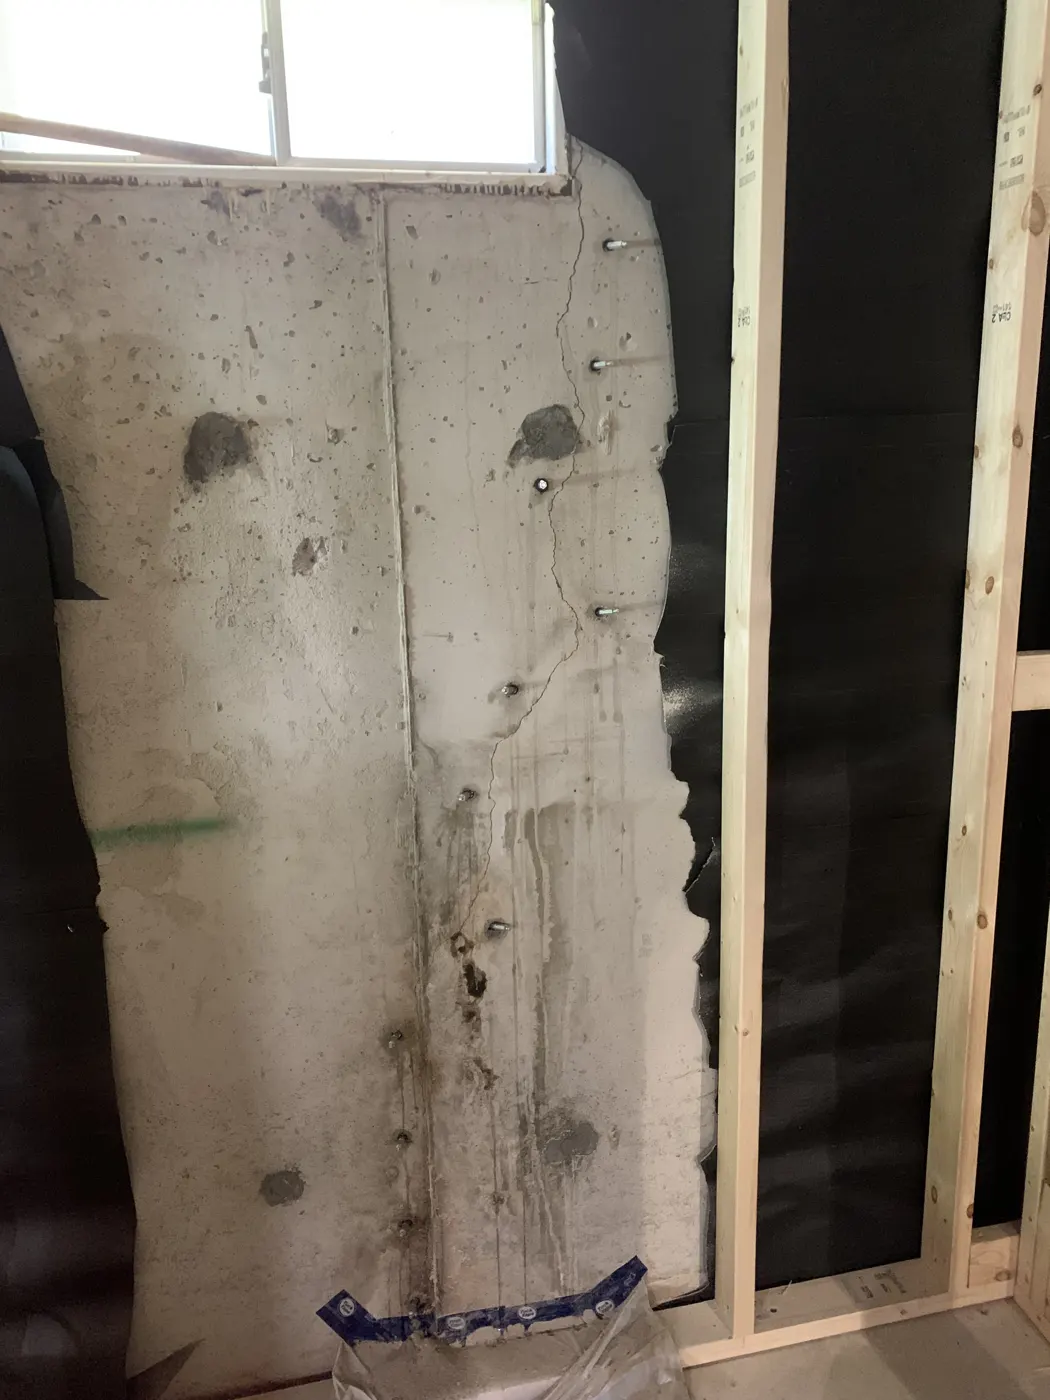
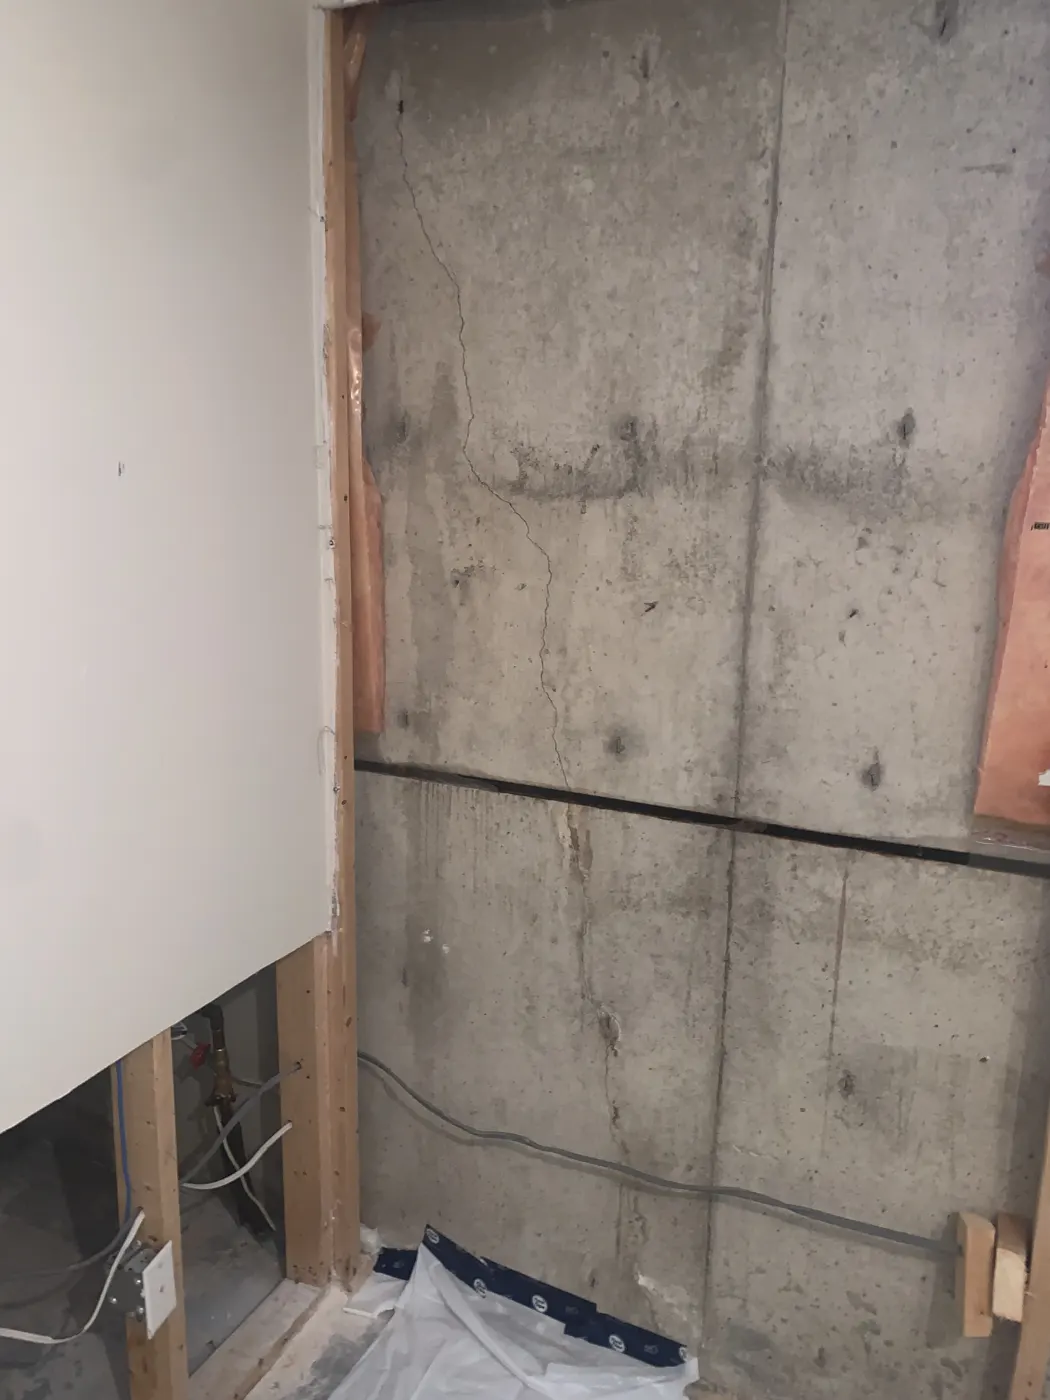
Sixty seconds on the phone, before anyone visits your basement.
Any contractor doing honest work answers all five without flinching. We publish our answers across the master injection guide and the cost page, and the assessment that confirms them is free.
The arithmetic that makes shortcuts expensive — for the homeowner, never the installer.
Run the numbers on Mode 1, the common case. The original cut-rate repair saves perhaps a couple of hundred dollars against our $750–$1,000 polyurethane range. When the skin lets go three winters later, the redo costs the full price of the injection that should have happened — plus whatever changed in between. If the basement got finished, add drywall access and refinishing. If the failure announced itself during a March melt rather than politely, add wet flooring, dehumidifiers and an insurance conversation. The savings were real for one invoice cycle; every cost after that lands on the homeowner, because short warranties are engineered to expire before Mode 1 does.
This is also the honest argument for paying attention rather than paying more: the difference between a permanent injection and a future callback is rarely price — it is the five questions in the section above, asked before the truck arrives.
Almost always, yes. A surface-sealed crack gets a true full-depth injection; a rigid-resin failure gets re-injected with flexible polyurethane along the re-opened line. Prior patch material sometimes adds drilling-out and cleaning time, which we price before starting. The one exception is Mode 4: if the wall is genuinely moving, the next call is an engineer, not more resin — and we will tell you that for free.
The opposite — it is the sign the job is working. Polyurethane expressing along the crack face means resin has travelled the crack’s full path and is filling toward the surface; crews watch for it as visual confirmation before moving up to the next port. A wall with resin appearing only at the port holes, not along the crack, is the one to worry about.
Read it as their own lifespan estimate for the work. Since properly injected cracks have no natural expiry, a short warranty on a “permanent” repair is a hedge against the shortcuts this page catalogues. It does not guarantee the work is bad — but it moves the burden of proof onto them. Ask why the number is not lifetime, and listen closely to the answer.
No — it adds prep, not impossibility. Hardware-store epoxies and caulks skin the crack face and block injection paths, so we drill out ports through the old material and clean the channel before injecting. Mention the DIY history when you call: it changes the time on site, occasionally the position in the price range, and never the warranty on the finished repair.
The failures on this page are why we wrote it, but keep the base rate honest: they are a small minority of jobs, concentrated among the cheapest quotes, and every mode is preventable with ordinary diligence. Injection remains the least invasive permanent repair for cracked poured walls — no excavation, one visit, warrantied for life. The technology is fine; the shortcuts are the product to avoid.
The installer does — that is the entire meaning of the warranty. Under ours, a leaking injected crack gets re-visited and made right at no charge, for the life of the structure, whoever owns the house by then. Get the equivalent commitment in writing from whoever you hire, and keep the invoice with the house records so a future owner can invoke it.
The evidence behind the taxonomy.
The five modes are first-party field data: patterns from repair and re-repair calls our crews run across Toronto, the GTA and Southern Ontario, current to the review date above. Resin behaviour reflects standard manufacturer practice for injection polyurethanes and epoxies. Prices referenced are our published ranges.
Free assessment, resin matched to the crack, full-depth fill to refusal — and the lifetime transferable warranty that makes shortcuts pointless.